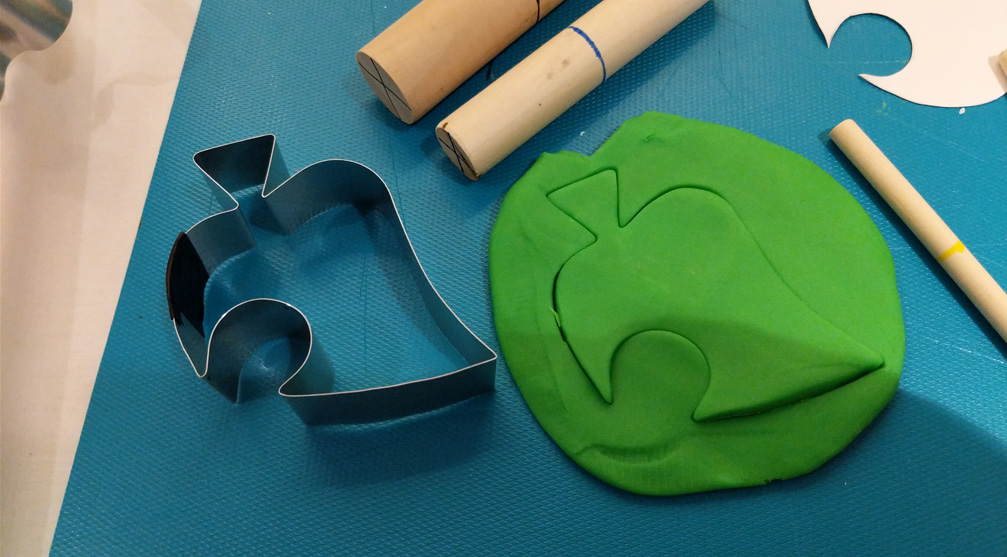
Whew, I’ve been so wrapped up with other projects I forgot to recap the cookie cutter workshop I ran at MAGLabs in September. This was the first workshop I’ve run, and it was an absolute joy to come share this fun little craft project with others. Thank you to everyone who attended!
I was quite happy with how everything went, and the creativity of some attendees who created their own designs and patterns – then built them! I also received some good feedback on improvements I could make if I run this workshop again in the future.
And speaking of future workshops, here’s a soft announcement that the cookie cutter workshop is coming to Super MAGFest this year! I’m super excited to bring this to the big event. The workshop will be running on Friday, January 4th, at 7:00 PM in the maker space (formerly the Forge).
I haven’t posted any of the instructional content I mentioned yet, but I’d like to do so before the workshop runs, so that the resources will be available online for everyone. In the meantime, here’s a link to the instructional sheets I handed out as part of the workshop, which includes a collection of pre-made patterns and some additional information like a pattern key and a bend radius guide:
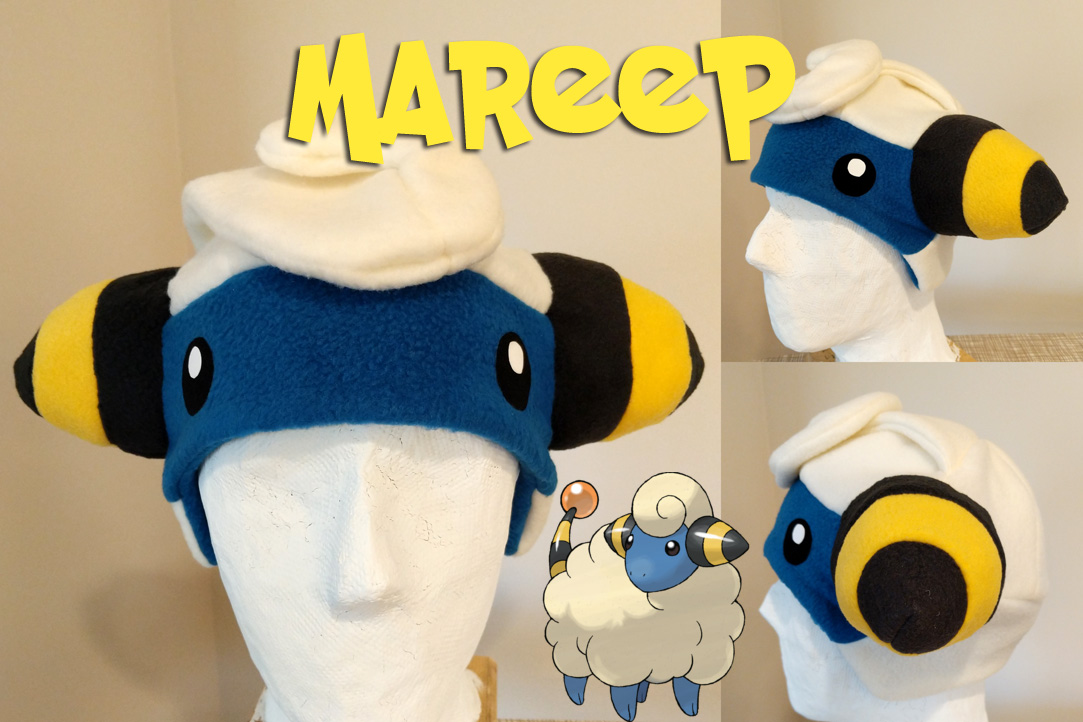
If you haven’t been up on Pokemon Go for the last several months, Niantic introduced a monthly recurring “community day” where a single Pokemon takes over the map for 3 hours. So far we’ve had a community day for Pikachu, Dratini, Bulbasaur, and most recently Mareep. Starting with Dratini, I made a hat themed for each community day.
This brings us to today’s hat: Mareep! I’ve only designed a handful of hats, but this was by far the most complicated one to create, both in terms of pattern and construction. If you’re up for a challenge though, I’m providing my patterns for free to anyone who wants them. The patterns are split across two files: a basic pattern that I use as a foundation for most of my hats, and a separate pattern with all of the Mareep-specific parts. Check the following links:
In the SVG files, each page is stored in a separate layer.
Note, the small marks covering the edges of some patterns are registration marks. After you trace and cut your fabric, go back and copy the registration marks to your seam allowance to help align fabric joins.
Materials
Fleece
I use Anti-Pill fleece for my hats, which can be found at Joanne’s or elsewhere. This stuff goes on sale for 40-70% off at Joanne’s pretty frequently, so that’s something to keep an eye out for.
The Mareep hat uses 4 colors: black, daffodil, ivory, and blue (I think I used mykonos blue, but availability might be spotty). You’ll need 1/4 – 1/2 yard of the ivory, and 1/4 yard or less for the other colors.
Polyfill
StripFlock
This is a brand name for fuzzy heat-transfer vinyl sheets. You’ll need black and white to make Mareep’s eyes.
Construction
The Mareep hat can be broken down into the basic parts: headband, crown, ear cones, and swirl.
Headband
The headband is constructed from one headband piece in the basic pattern, and one each of the front / back headband pieces in the Mareep pattern. The basic pattern should be sewn together at the ends to form a loop. The front and back patterns should be sewn together at the curved ends where they fit together, also forming a loop. The front and back parts should be using different fabric colors.
Place one loop inside the other (“bad” side of fleece facing out on each side) and sew them together along the bottom edge. Fold right-side-out.
Swirl
Sew the smaller swirl part to the larger swirl part where they fit together as indicated by the registration marks on those pieces. Repeat for the flipped pieces for the back side. With both sides created, put them together bad side out, and sew the edges together everywhere except for the wide “top”, which is where the swirl will attach to the crown. You’ll need to do this in two steps, because the fabric overlaps back onto itself. Turn inside out and set aside.
Crown
The crown is constructed from two of the basic pattern triangles, and two each of the Mareep pattern triangles. Sew together the 3 front pieces and 3 back pieces as separate halves. Remember that the circle “notches” should be on the ends of each half. Take the swirl you set aside, and place it between the two halves of the crown. When turned inside-out, the swirl should be pointing into the hat.
Sew the halves together, which also sews the swirl in place. Try to pin it securely; 4-6 layers of fleece is a lot of bulk and the swirl will easily slip under the presser foot of your machine.
Ear Cones
Sew cone parts 1, 2, and 3 together to create a single striped piece. Use the registration marks to help you line up the edges. Once combined, sew the side edges together to complete the cone shape, then turn inside-out. Repeat for a second cone.
Attaching the ear cones to the headband
Unfold the headband so that you have a wide ring of fabric with circular notches cut out on one side. Pin the cones to these cut-out areas (the registration marks are REALLY important here to make sure the cones will attach evenly to all parts of the hat). Additionally, take your cone bottom circle pieces, and pin half of them to the inside of the cone. You should have 3 layers of fabric forming a semi-circle: the outer headband, the cone, and the cone bottom. Carefully sew these layers together. Fold the headband right-side-out again.
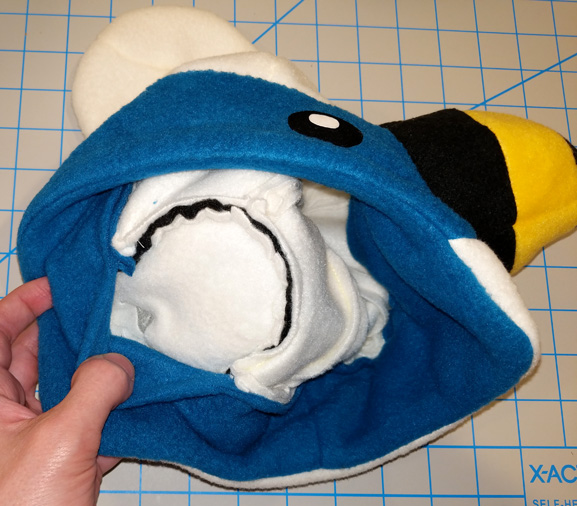
Cone attachment and poly-fill access
If done correctly, the bottom half of each cone will be secured to the headband, with the bottom half of the cone bottom also secured in place on the inside. The inside layer of the headband overlaps that circle, but is not directly attached to it.
Attaching the headband to the crown
You’ll essentially repeat the previous step, but attaching the cones to the crown part instead. Working on the inside of the hat, start by pinning each cone in place, and then pin the remaining crown areas to the headband. Once everything is secure, do a test fit (careful not to poke yourself!). If the hat sits too high or low, you can unpin it and adjust the slack in your seam allowance to make up the difference.
At this point the hat is quite unwieldy to manage, so expect to sew the cone parts and headband parts separately.
Stuffing the cones
If you assembled everything correctly, then the interior side of the headband is not attached to anything over the cones. Pull this back with your hand, and use scissors to cut a small opening in the cone bottom pieces. Use these holes to stuff the cones with poly-fill. Add enough poly-fill to get a good self-supporting shape, but don’t overfill. Too much fill will create extra pressure on the side of your head when wearing the hat. The holes you cut will be hidden by the headband and you can access them later to adjust the fill if needed.
Adding Eyes
Although you can use a variety of materials for this, I use strip flock in the form of iron-on vinyl transfers. Cut out the eye-shaped pieces from your flock sheet. Hang your hat from the end of an ironing board, with the area you’ll be adding the eye sitting on top of the board. Position your eye piece, cover in a thin cloth or Teflon sheet, then press and hold a hot iron over the area for about 15 seconds. I suggest a medium-high setting (e.g. wool) and to iron as small an area as possible. The heat will slightly damage the fleece, so do not over-iron. The iron-on flock can be stacked, but each layer needs to be ironed separately.
Simplified Construction
To create a simplified version of this hat, instead construct a blue and ivory version of the basic hat pattern with the swirl stitched into the top as described (or not, for an even simpler design). After the hat is completed, build your ear cones, stuff them with some poly-fill, and hand sew them onto the sides of the hat. Tuck the edges in and use a basic ladder stitch for a clean attachment. This won’t be quite as secure as the machine stitch, and you will not be able to adjust the fill levels without ripping part of your seam.
For the last 15 months, when the weather has been cooler, I’ve been wearing fleece Pokemon hats almost religiously. They’re nice to wear indoors or outdoors. They keep my bald head warm. They just look really fun and cool. I get comments all the time from strangers about how cool my Bulbasaur hat is. I’ve got 4 different ones that I purchased from a con vendor between the last two MAGFests. Early this year though, I started making my own, including the 3 in the image above.
Making my own hats gives me more excuses to use the sewing machine I bought for last year’s cosplay project. It’s a fun challenge to learn the various aspects of design, patterning, and assembly. It’s fun to share (and wear!) what I’ve made with everyone else. Some of the skills overlap with new cosplay projects I’m starting. So really there’s lots of great reasons to do this (or so I tell myself).
This is by no means a side industry for me, but as I go along I’d like to share what I’ve made and learned. That will probably include a couple of tutorials, as well as the patterns I’ve created and digitized. When I was originally out searching for information on this topic, I came up surprisingly short-handed for making the particular kind of hat I wanted. So while there’s great resources out there from people clearly more expert than myself, I hope pulling this information into a common place will be helpful.
A particular kind of what?
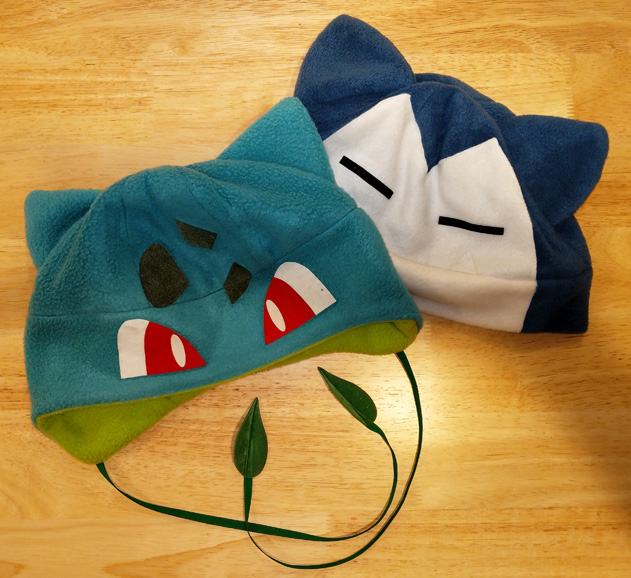
A Bulbasaur and Snorlax bought at MAGFest
Both years I’ve been at MAGFest, there’s been 2 or 3 vendors on the floor selling these fleece hats of Pokemon and other video game or movie characters. Since these are all hand-made items, each vendor has their own spin on how to design and build their hats. For example, all of the hats at one vendor follow a beanie template constructed from a single piece of fabric. This is the same kind of pattern that is easiest to find when looking for resources online.
The kind of hat I want to build is assembled from multiple pieces. An upper half made out of sections of “orange peel” and a lower half that could be a straight band or have ear flaps built in. Constructing a hat from multiple pieces creates more opportunity for sewing in features like ears, spines, tails, or other fun details.
Another difference is how details like eyes are created and added to hats. Some vendors cut out additional pieces of fleece or felt and sew them onto the hat, which I think gives a ragged look. An alternative is to cut out pieces of fuzzy vinyl heat transfers and iron them on. The details are sharp and there’s more opportunity for layering.
Perhaps the biggest reason I’m diving into all this is the vendor that used all those techniques I like, Athena’s Wink, has since closed their business. If I want hats like that, I may not be able to find them at the cons. I’ve got to make them myself. And I still have a few more I want for my personal use, like a Scyther and a Gumo.
In my previous posting, I talked about my big fail trying to create a crude mannequin of my own head. Picking the wrong filling strategy (spray foam) quickly led to a total loss of the project. That’s super annoying, but the time investment to get to that point was only a couple hours, so I gave it another shot.
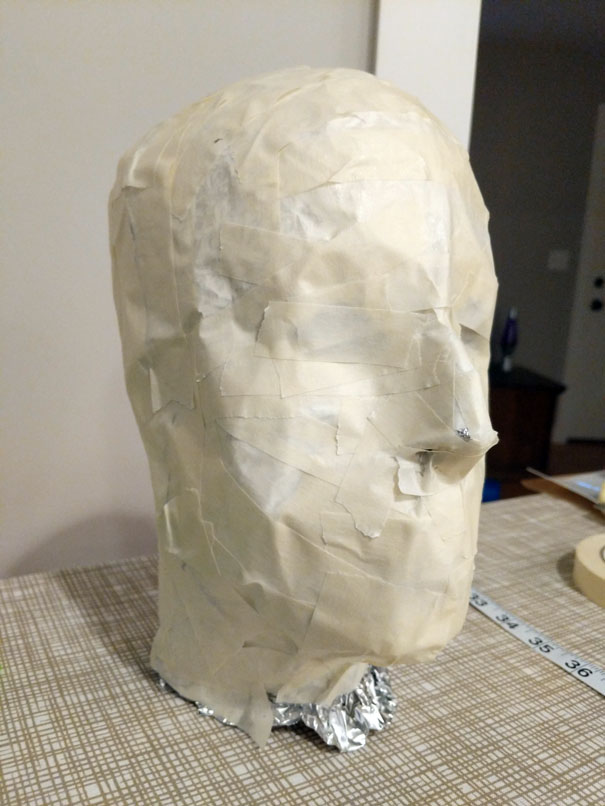
The masking tape process probably came together a bit better this time, leveraging my earlier experience. Combining the two haves on the other hand was trickier for reasons I don’t understand.
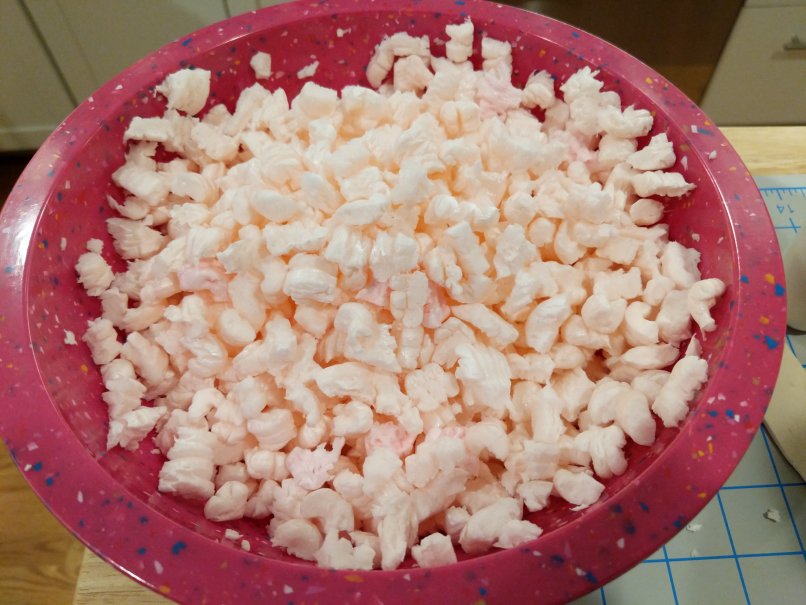
For filling, I tried to stick to the method in the video guide. I still didn’t have any stiff packaging Styrofoam, but I did have an old box full of packing peanuts. I haven’t seen packing peanuts actually used in shipping in years, so it’s probably not a common thing to have on hand. I had a few different kinds mixed together in my box. S-shaped peanuts. Figure-8 peanuts. Peanuts that look like beige cheesy poofs. The poofs are made of cellulose and dissolve in water, so they’d be a bad fit for this project. They were also way squishier than the others. I went with the S-peanuts exclusively since they were firmer and they broke up into small pieces very easily.
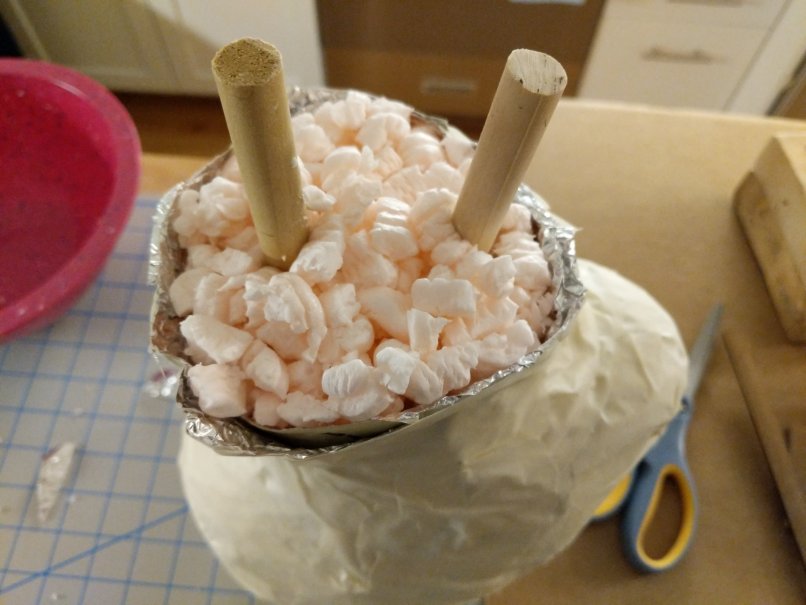
After filling a bowl with broken up peanuts, I mixed small batches with Elmer’s glue and then packed them into the head. With the cardboard supports in the way, it was difficult to direct the filling into all the spaces deeper in the head cavity. This only got worse after inserting 2 wooden support dowels halfway through. I ended up using about 4 mixing bowls worth of peanut bits before filling it to the top. After leaving the glue-soaked bits to cure over night, the head still felt really soft, and stiffer Styrofoam chunks would have probably been better in this case.
For the base, I didn’t have any more spent tape rolls lying around. I sacrificed my only one on the previous disaster. For a substitute, I cut two square pieces from 2×6 framing lumber, stacked them, and drilled two 3/4 inch holes. Stacking the two pieces gave me enough height to insert the wooden dowels without hitting the table below. The base and perimeter of the “neck” was glued down with hot glue. The drilled holes were wider than my dowels, so I injected hot glue into the remaining space to lock the dowels in place. It’s a nice stable base and I think it’s better than the tape roll method.
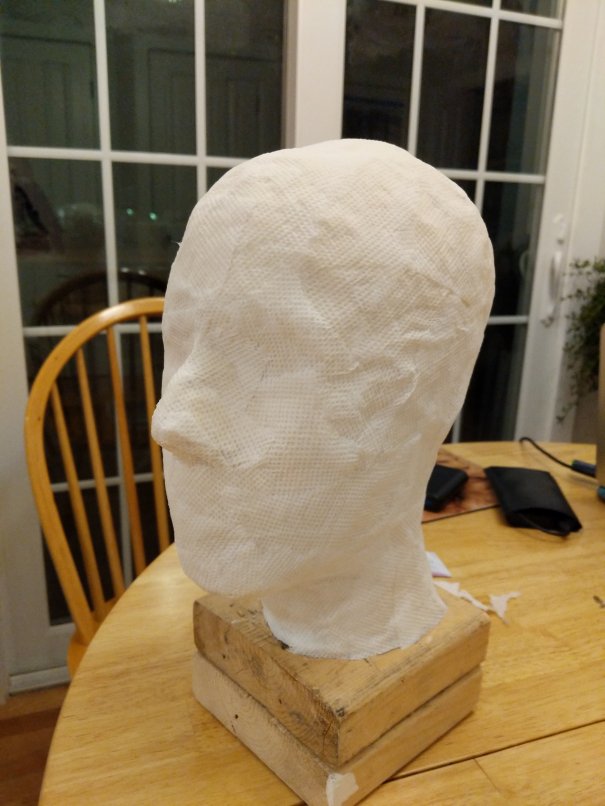
I followed the rest of the recipe to the letter. I coated the head in “paper towel gauze” with brushed diluted Elmer’s glue. This was also the place to make some minor corrections, like filling a wide dent in the forehead I created when I had it upside down for filling. Once the head was allowed to dry overnight, I painted over it with some ceiling paint I had on hand. I ended up with a lot of small cracking in the paint after it dried, so I probably applied the paint too thick. Though the paint was a bit old and I suspect not in great condition. The wet paint ended up softening the shell, but the end result is firm. I’m not planning to test that with any significant force, but it should be usable for projects.
I started attending MAGFest in 2017. For the two years I’ve gone, I’ve brought a cosplay with me. First was Gumo from Ori and the Blind Forest, which was a fun but time consuming project. Then there was Monster Kid from Undertale, which was a fun and much easier costume. With MAG 2018 behind us and the next one to look forward to, it’s time to start planning my next creation. (Spoilers, I want to try and do Scyther)
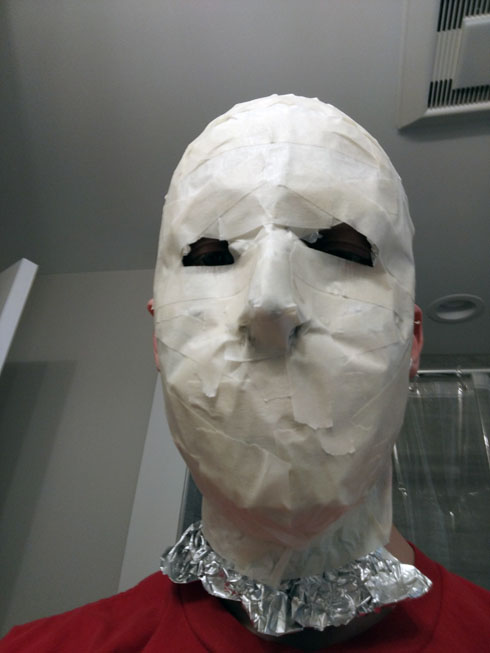
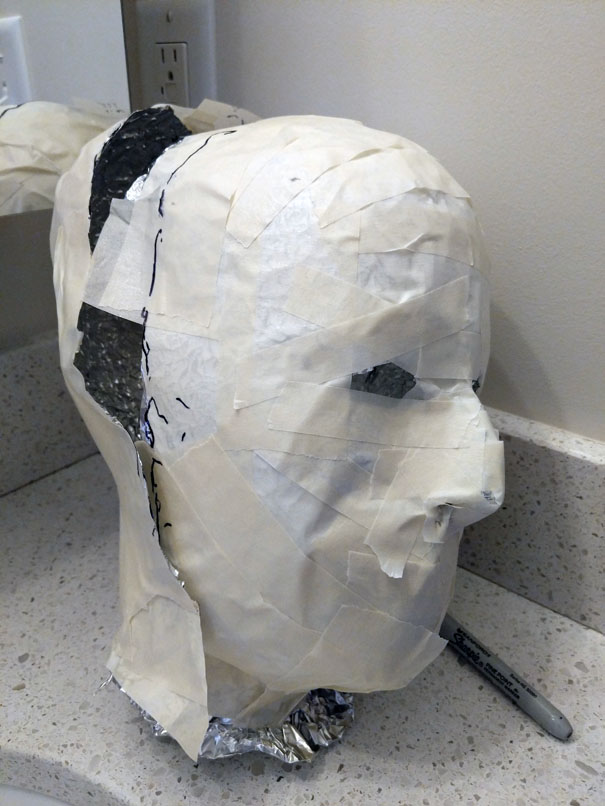
Beyond the very initial planning, which included partially assembling a paper craft, the first step is to create a reasonably good approximation of my own head. An auto-mannequin, if you will. After a little bit of looking, I decided to try this approach by Youtuber Dali DIY:
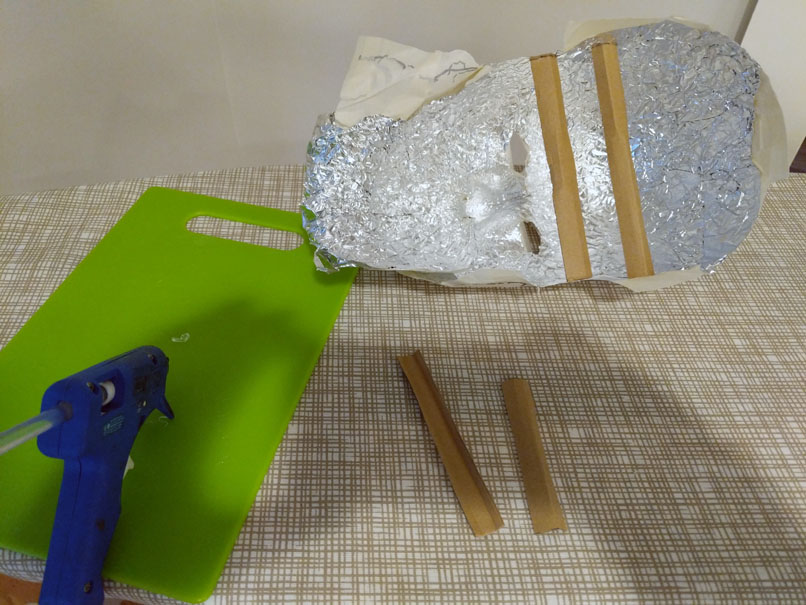
The gist of the process is you cover your face in aluminum foil, then fully cover it in layers of masking tape. The two halves are crafted separately and then rejoined after taking some measurements of your own head. By the way, if you need to measure your head, I found that a speed clamp works pretty well. It’s like a giant, less precise pair of calipers that you can clamp over your noggin, then measure with a ruler. Once you have your measurements, you cut some cardboard supports to glue inside and then recombine the halves. Once that’s good, you need to pack it with a filler. Dali uses a mixture of broken up Styrofoam bits and PVA (Elmer’s) glue. Pack the head, insert some support rods, mount it on something stable, and let it dry. The mannequin is further reinforced by covering it in strips of paper towel soaked in Elmer’s.
It’s rough and sloppy, but uses materials most of us have hanging around so it’s pretty cheap to try. And for making a bulky Pokemon head, rough should be good enough.
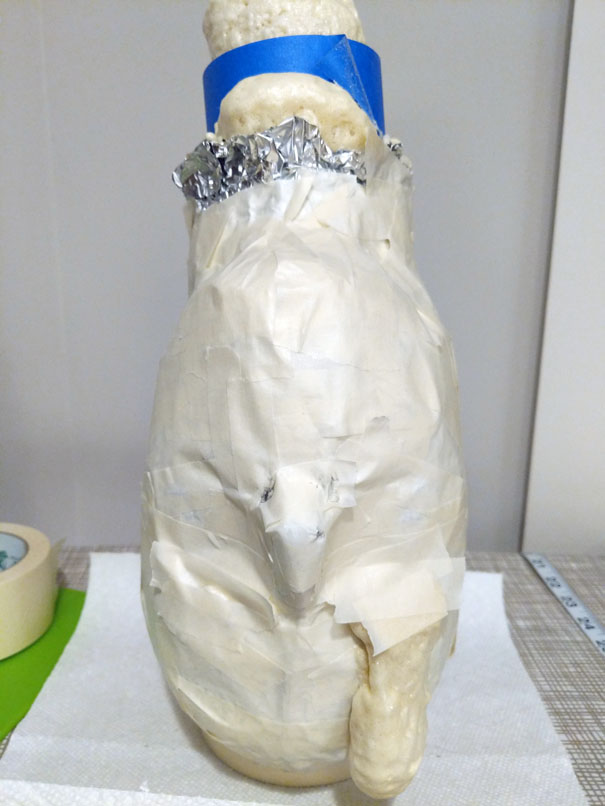
I started the process and it was going pretty well up through recombining the foil/tape halves with supports. Here’s a few pictures of that process.
But then I decided to change the script. I don’t have any styrofoam hanging around — I try to get rid of that stuff as fast as possible. And I don’t think I have enough glue either. And it looks like a pretty messy and time-consuming process to keep mixing up the foam and glue and stuff and pack that head mold. So what else do I have on hand that looks like a good candidate? Expanding spray foam!
In theory, I just shake up the can, spray it in the head, and let it expand to fill the cavity. All the excess foam can bubble and push its way out of the neck hole, and I’ll saw it off later.
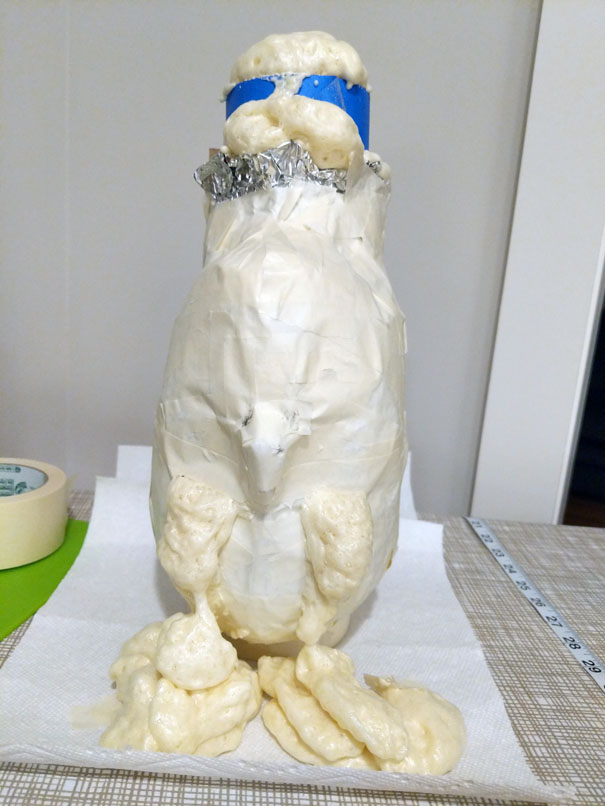
Oh … oh god … what is going on … no … stop … aaaaaagh.
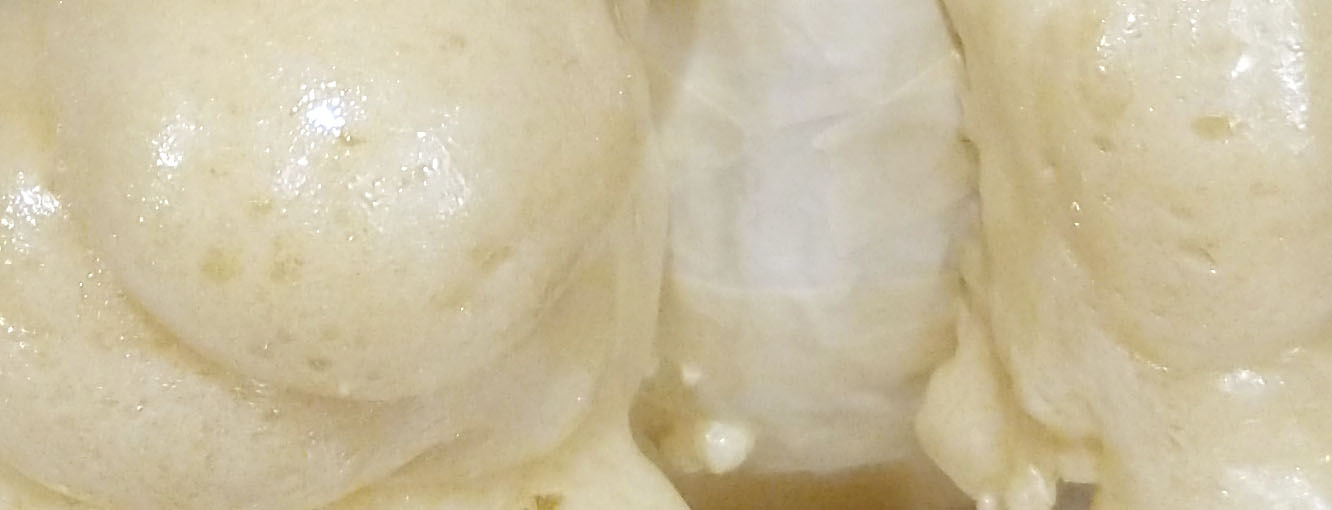
Well my first mistake was underestimating how much the foam would expand from its initial volume. It didn’t take long for the foam to break through the meager strips of tape covering my eye holes, oozing out and hardening in a foamy reenactment of the Chernobyl elephant’s foot. This went on for hours, and when it finally stopped and I cut off one of these eye pillars, the foam just started oozing again.
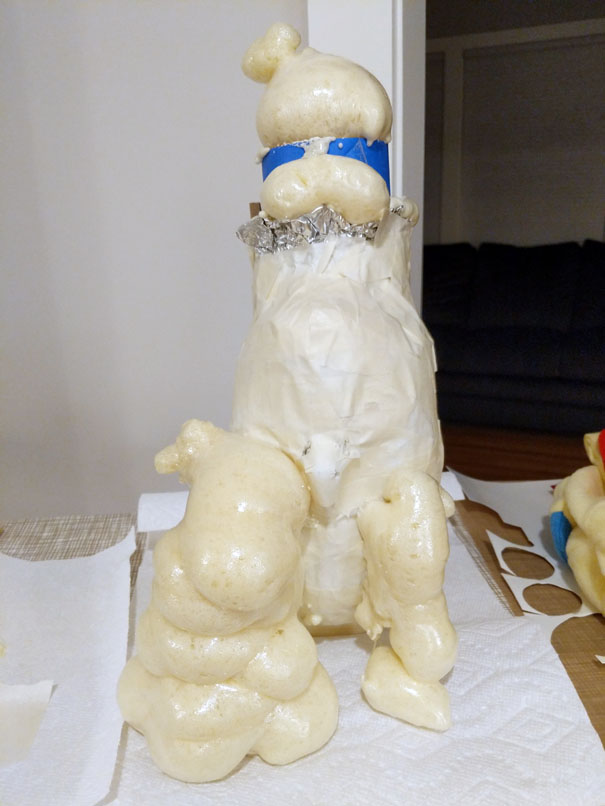
And this gets to the second and more fundamental mistake: expanding spray foam is not suitable for an enclosed cavity. Like a foil-lined head mold. Spray foam needs to react with moisture in air to expand and cure. With no source of moisture, it will remain in its frothy, volatile, semi-liquid state. Potentially forever. And after a day of letting this thing sit, the head readily caved in to even light pressure applied. The foam wasn’t curing, and now I have this nasty horror show of elephant-foot-face sitting on my counter.
If you’re working on a project and learning as you go, I don’t think it’s a bad thing to try and go off script. You might discover something cool. But maybe reconsider if you’re on a tight deadline. It might just melt down in front of you and you’ll have to start over from scratch.


