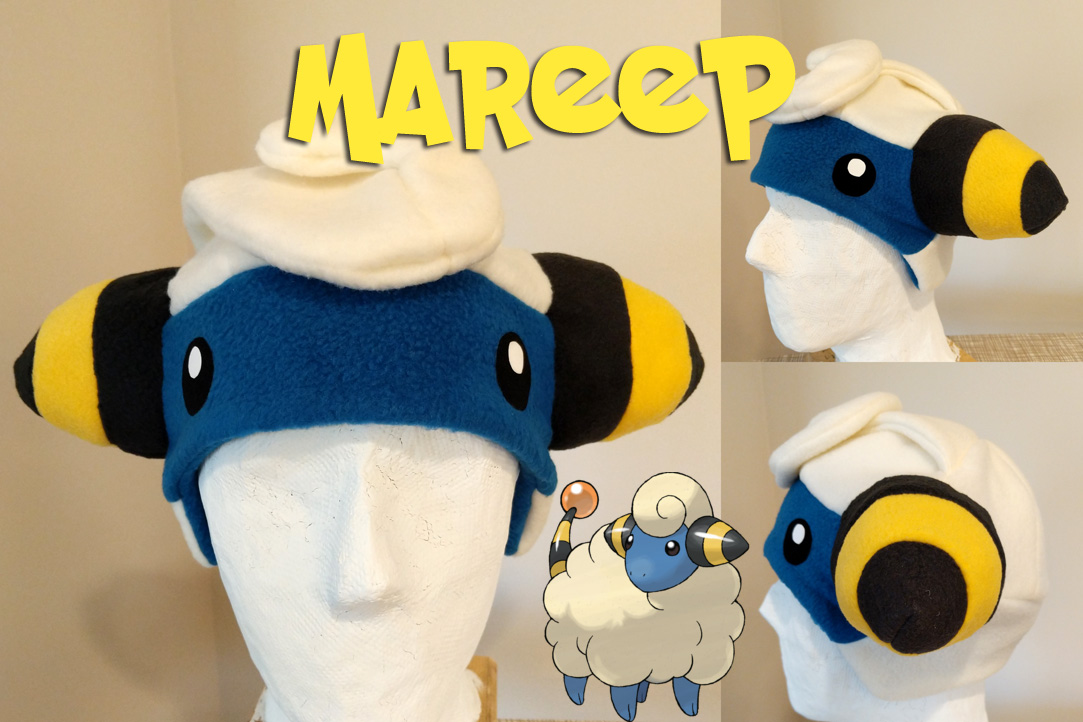
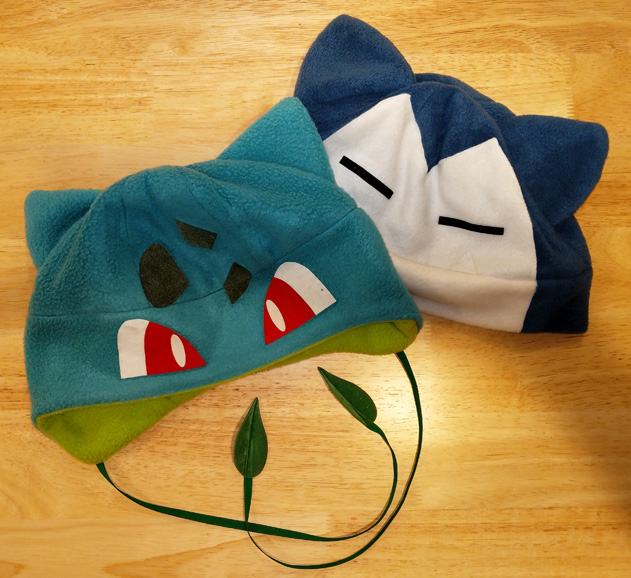
If you haven’t been up on Pokemon Go for the last several months, Niantic introduced a monthly recurring “community day” where a single Pokemon takes over the map for 3 hours. So far we’ve had a community day for Pikachu, Dratini, Bulbasaur, and most recently Mareep. Starting with Dratini, I made a hat themed for each community day.
This brings us to today’s hat: Mareep! I’ve only designed a handful of hats, but this was by far the most complicated one to create, both in terms of pattern and construction. If you’re up for a challenge though, I’m providing my patterns for free to anyone who wants them. The patterns are split across two files: a basic pattern that I use as a foundation for most of my hats, and a separate pattern with all of the Mareep-specific parts. Check the following links:
- Basic Pattern – 23 inch, 6 panels, ear flaps (PDF) | (Inkscape SVG)
- Mareep Pattern (PDF) | (Inkscape SVG)
In the SVG files, each page is stored in a separate layer.
Note, the small marks covering the edges of some patterns are registration marks. After you trace and cut your fabric, go back and copy the registration marks to your seam allowance to help align fabric joins.
Materials
Fleece
I use Anti-Pill fleece for my hats, which can be found at Joanne’s or elsewhere. This stuff goes on sale for 40-70% off at Joanne’s pretty frequently, so that’s something to keep an eye out for.
The Mareep hat uses 4 colors: black, daffodil, ivory, and blue (I think I used mykonos blue, but availability might be spotty). You’ll need 1/4 – 1/2 yard of the ivory, and 1/4 yard or less for the other colors.
Polyfill
StripFlock
This is a brand name for fuzzy heat-transfer vinyl sheets. You’ll need black and white to make Mareep’s eyes.
Construction
The Mareep hat can be broken down into the basic parts: headband, crown, ear cones, and swirl.
Headband
The headband is constructed from one headband piece in the basic pattern, and one each of the front / back headband pieces in the Mareep pattern. The basic pattern should be sewn together at the ends to form a loop. The front and back patterns should be sewn together at the curved ends where they fit together, also forming a loop. The front and back parts should be using different fabric colors.
Place one loop inside the other (“bad” side of fleece facing out on each side) and sew them together along the bottom edge. Fold right-side-out.
Swirl
Sew the smaller swirl part to the larger swirl part where they fit together as indicated by the registration marks on those pieces. Repeat for the flipped pieces for the back side. With both sides created, put them together bad side out, and sew the edges together everywhere except for the wide “top”, which is where the swirl will attach to the crown. You’ll need to do this in two steps, because the fabric overlaps back onto itself. Turn inside out and set aside.
Crown
The crown is constructed from two of the basic pattern triangles, and two each of the Mareep pattern triangles. Sew together the 3 front pieces and 3 back pieces as separate halves. Remember that the circle “notches” should be on the ends of each half. Take the swirl you set aside, and place it between the two halves of the crown. When turned inside-out, the swirl should be pointing into the hat.
Sew the halves together, which also sews the swirl in place. Try to pin it securely; 4-6 layers of fleece is a lot of bulk and the swirl will easily slip under the presser foot of your machine.
Ear Cones
Sew cone parts 1, 2, and 3 together to create a single striped piece. Use the registration marks to help you line up the edges. Once combined, sew the side edges together to complete the cone shape, then turn inside-out. Repeat for a second cone.
Attaching the ear cones to the headband
Unfold the headband so that you have a wide ring of fabric with circular notches cut out on one side. Pin the cones to these cut-out areas (the registration marks are REALLY important here to make sure the cones will attach evenly to all parts of the hat). Additionally, take your cone bottom circle pieces, and pin half of them to the inside of the cone. You should have 3 layers of fabric forming a semi-circle: the outer headband, the cone, and the cone bottom. Carefully sew these layers together. Fold the headband right-side-out again.
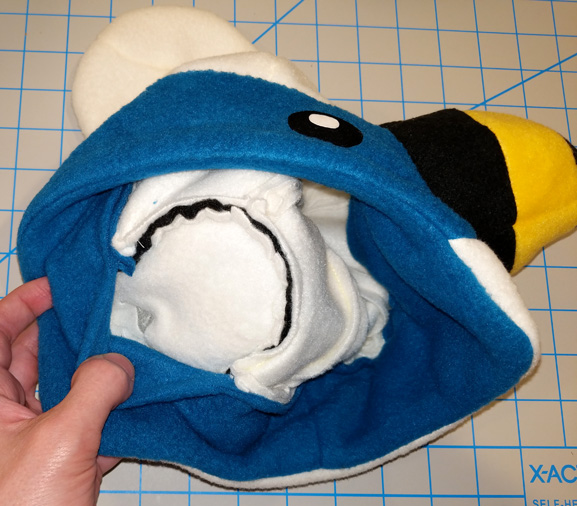
If done correctly, the bottom half of each cone will be secured to the headband, with the bottom half of the cone bottom also secured in place on the inside. The inside layer of the headband overlaps that circle, but is not directly attached to it.
Attaching the headband to the crown
You’ll essentially repeat the previous step, but attaching the cones to the crown part instead. Working on the inside of the hat, start by pinning each cone in place, and then pin the remaining crown areas to the headband. Once everything is secure, do a test fit (careful not to poke yourself!). If the hat sits too high or low, you can unpin it and adjust the slack in your seam allowance to make up the difference.
At this point the hat is quite unwieldy to manage, so expect to sew the cone parts and headband parts separately.
Stuffing the cones
If you assembled everything correctly, then the interior side of the headband is not attached to anything over the cones. Pull this back with your hand, and use scissors to cut a small opening in the cone bottom pieces. Use these holes to stuff the cones with poly-fill. Add enough poly-fill to get a good self-supporting shape, but don’t overfill. Too much fill will create extra pressure on the side of your head when wearing the hat. The holes you cut will be hidden by the headband and you can access them later to adjust the fill if needed.
Adding Eyes
Although you can use a variety of materials for this, I use strip flock in the form of iron-on vinyl transfers. Cut out the eye-shaped pieces from your flock sheet. Hang your hat from the end of an ironing board, with the area you’ll be adding the eye sitting on top of the board. Position your eye piece, cover in a thin cloth or Teflon sheet, then press and hold a hot iron over the area for about 15 seconds. I suggest a medium-high setting (e.g. wool) and to iron as small an area as possible. The heat will slightly damage the fleece, so do not over-iron. The iron-on flock can be stacked, but each layer needs to be ironed separately.
Simplified Construction
To create a simplified version of this hat, instead construct a blue and ivory version of the basic hat pattern with the swirl stitched into the top as described (or not, for an even simpler design). After the hat is completed, build your ear cones, stuff them with some poly-fill, and hand sew them onto the sides of the hat. Tuck the edges in and use a basic ladder stitch for a clean attachment. This won’t be quite as secure as the machine stitch, and you will not be able to adjust the fill levels without ripping part of your seam.
